Quick Start
This quick start guide introduces you to Eilmer, and takes you through to running a simple simulation of supersonic flow over a sharp cone. It should take less than half an hour to do the full set up and run.
Note: The section on installing prerequisites assumes a working knowledge on linux system configuration. If you find this section it too quick or too terse, you could try the gentler chapter on Installation.
Install prerequisites
The main requirement is a D language compiler. We recommend using the latest stable release of the LLVM D compiler.
To build Eilmer and other programs in the toolkit, you will require:
- D compiler
- Binary releases for the latest stable release of the LLVM D compiler (
ldc2andldmd2) may be found at: https://github.com/ldc-developers/ldc/releases . An install guide for the LLVM D compiler is available here.
- Binary releases for the latest stable release of the LLVM D compiler (
- A C compiler
- GNU compiler is a good option and comes standard on most systems.
- The gfortran compiler (and 32-bit libraries)
- gfortran and gfortran-multilib on Debian/Ubuntu/Mint
- gcc-gfortran on RedHat/CentOS/Fedora
- git (to clone the repository)
- readline development package:
- libreadline-dev on Debian/Ubuntu/Mint
- readline-devel on RedHat/CentOS/Fedora
- ncurses development package:
- libncurses5-dev on Debian/Ubuntu/Mint
- ncurses-devel on RedHat/CentOS/Fedora
- openmpi development package:
- libopenmpi-dev on Debian/Ubuntu/Mint
- openmpi-devel on RedHat/CentOS/Fedora
(after install on RedHat-family systems, load with
module load mpi/openmpi-x86_64, and you might like to place that in your.bashrcfile so that it’s loaded every time you start a session)
- plotutils development package:
- libplot-dev on Debian/Ubuntu/Mint
- plotutils-devel on RedHat/CentOS/Fedora (for CentOS 8.x, enable PowerTools repo)
- foreign-function interface packages for Python and Ruby:
- python3-cffi on Debian/Ubuntu/Mint and RedHat/CentOS/Fedora
- ruby-ffi on Debian/Ubuntu/Mint
Additionally, if you want to run the test suite, you will require:
- Ruby package
- TCL package
- the Python sympy package
For viewing and plotting results, we recommend:
- Paraview
- Gnuplot
The source code of the Lua interpreter is included in the source code repository.
Getting the source code
The full source code for the toolkit programs, including a set of examples, can be found in a public repository on github. To get your own copy, use the git revision control client to clone the repository with the following command:
git clone https://github.com/gdtk-uq/gdtk.git gdtk
and within a couple of minutes, depending on the speed of your network connection, you should have your own copy of the full source tree and the complete repository history.
Installing Eilmer
The default installation directory is $HOME/gdtkinst.
To compile and install Eilmer, move into the eilmer source
area and use make to coordinate the compiling and installing:
cd gdtk/src/eilmer
make install
If you are on a Mac, you’ll need to give the make command an
extra hint:
make PLATFORM=macosx install
Configure environment
We’ll assume you are happy using the default install area $HOME/gdtkinst.
The next step is to configure your environment to use Eilmer.
You will need to set the DGD variable to point to the top of the installation tree,
and the DGD_REPO variable to point to the top of the repository tree.
Note that the installation tree and repository tree are separate.
You then also need to set $PATH, $DGD_LUA_PATH and $DGD_LUA_CPATH
to point to the appropriate places.
Some example lines from a .bashrc file are:
export DGD=$HOME/gdtkinst
export DGD_REPO=$HOME/gdtk
export PATH=$PATH:$DGD/bin
export DGD_LUA_PATH=$DGD/lib/?.lua
export DGD_LUA_CPATH=$DGD/lib/?.so
Remember to refresh your current shell (or log out and log back in) so that your newly configured environment is available.
Running your first Eilmer simulation
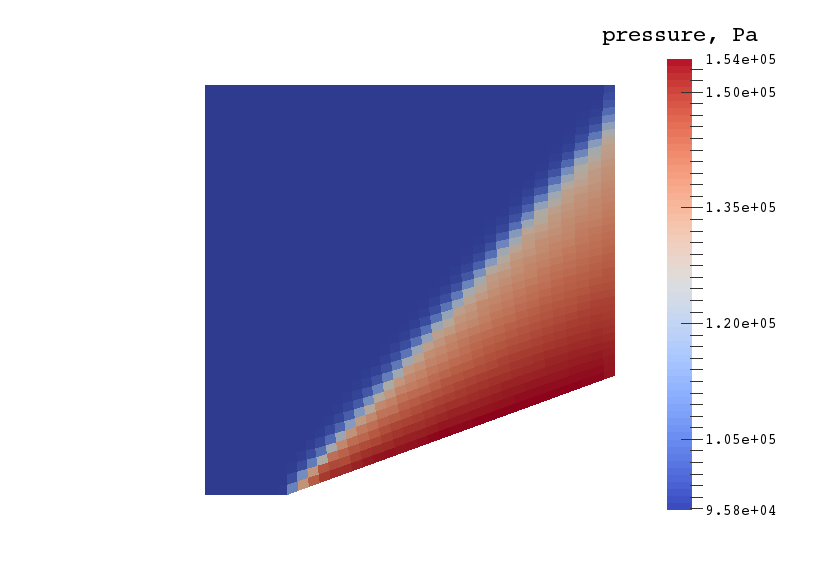
To test that everything has worked, you can exercise the flow solver to simulate the supersonic flow over a 20-deg cone.
cd ~
cd gdtk/examples/eilmer/2D/sharp-cone-20-degrees/sg
prep-gas ideal-air.inp ideal-air-gas-model.lua
e4shared --prep --job=cone20
e4shared --run --job=cone20
e4shared --post --job=cone20 --vtk-xml
If all of that worked successfully, you may view the final flow field using Paraview::
paraview plot/cone20.pvd
The image below shows contours of pressure in the flow domain.
